Twikoo私有化部署(docker)

Twikoo私有化部署(docker)

前言

随着博客的各种功能完善,搭建一个评论系统刻不容缓。我最终选择了Twikoo评论系统,并且进行私有化部署。

参考文档

Twikoo 文档

操作步骤

以下操作在服务器里进行

安装docker

首先,通过宝塔面板安装docker(如果没有安装宝塔面板,请通过命令安装)
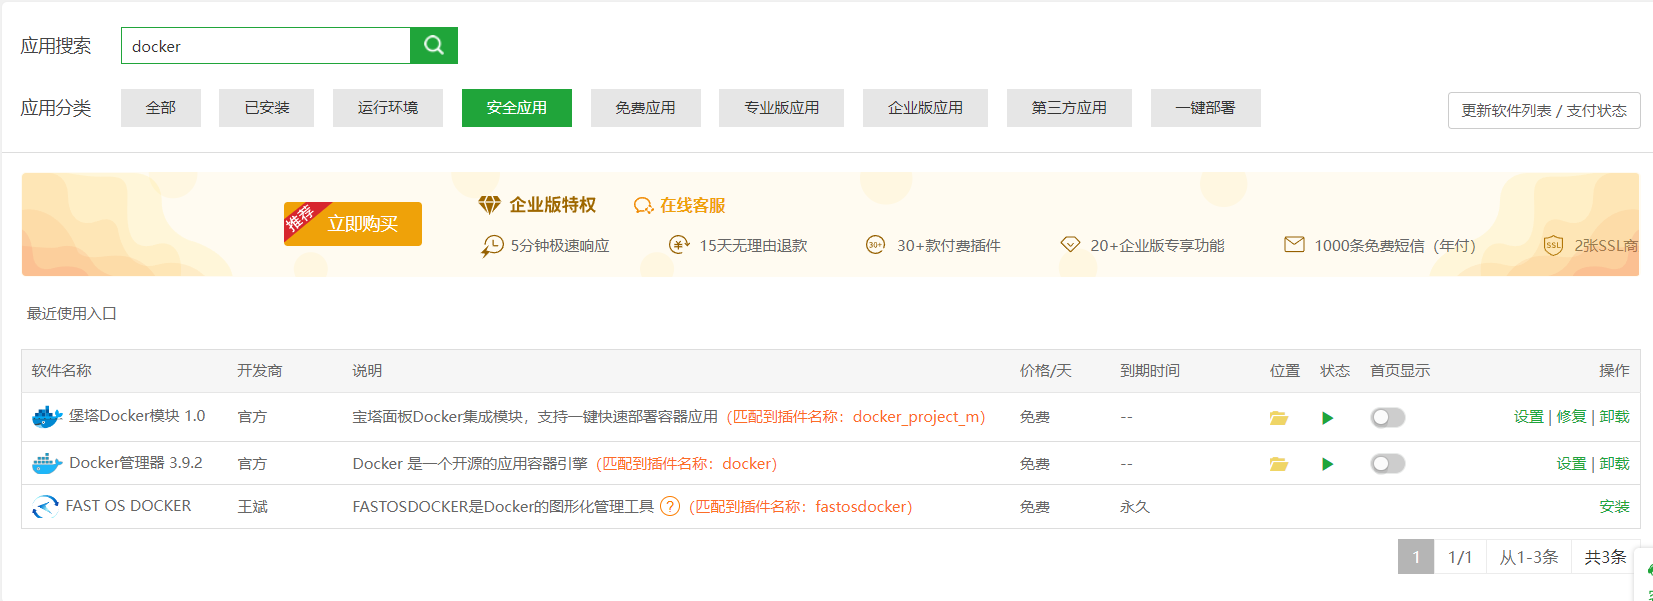
image-20230527151906719

安装好了可以通过以下命令检验

1
docker -version

开始部署

拉取Twikoo镜像

1
docker pull imaegoo/twikoo

创建并启动容器

1
docker run --name twikoo -e TWIKOO_THROTTLE=1000 -p 8080:8080 -v ${PWD}/data:/app/data -d imaegoo/twikoo

将服务器的8080端口打开

测试容器是否正常运行

在浏览器输入http://服务器IP地址:端口号>,出现下图内容表示成功

image-20230527165928027

主题文件设置

设置主题使用Twikoo

1
2
3
4
5
6
7
8
9
10
comments:
# Up to two comments system, the first will be shown as default
# Choose: Valine/Waline/Twikoo/Artalk
use: Twikoo
text: true # Display the comment name next to the button
# lazyload: The comment system will be load when comment element enters the browser's viewport.
# If you set it to true, the comment count will be invalid
lazyload: false
count: true # Display comment count in post's top_img
card_post_count: false # Display comment count in Home Page

配置envID

1
2
3
4
5
6
7
# Twikoo
# https://github.com/imaegoo/twikoo
twikoo:
envId: http://服务器IP地址:端口号
region:
visitor: false
option:

暂时就这样,以后出现问题再更。